skip to main |
skip to sidebar
The house we bought nearly 3 years ago is a Fixer-Upper. I've been taking my time fixing it up because I figured we'd be in this house a long time. But now that I've decided to sell the house and move to the country, it's time to get the DIY skills in high gear (if you're frugal, you are dedicated to learning Do It Yourself techniques).
Most of the ceilings in this house were not taped when they were repaired. I'm assuming this untaped drywall (aka sheetrock, wallboard, gypsum board) job was a repair, because I can't imagine the ceilings in this 50+ year old house are original.
Anyway, after reading a zillion web sites and buying the recommended Black and Decker Home Repair and Improvement books (these books are a great investment if you are a DIYer), I decided I could improve the repair. So, after a run to Lowes to buy joint tape and joint compound, I was ready to begin.
I spread a thin layer of mud (aka joint compound) along a 5 foot section of the ceiling where two sheets of drywall came together (the untaped joint). Then I put the joint tape on and smoothed it out, working from the center out to get excess mud out from under the tape.
After 2 more days of putting thin layers of mud over the tape, feathering it out to blend with the surrounding ceiling, and waiting overnight for each layer to dry, the joint looked pretty good.
But then, I had an "bright" idea. I'd read about a drywall repair online in which the DIYer had cut the tape in half horizontally, effectively reducing the amount of mud needed and time spent feathering the mud.
So, I figured that if I cut the tape in half before I laid it on the joint, it would take less time and less mud to feather it out.
Boy was that a bad idea. In the first place, trying to keep the 2" wide tape straight was hard enough, but when I cut it down to 1" it was nearly impossible to tell where the joint was and keep it straight.
That didn't stop me though. I kept cutting the tape in half and eventually finished the first room. Once again, I applied (what I thought was) thin layers of mud over the tape and waited overnight for them to dry.
After buying the Kilz primer, I inspected the ceiling. I wanted to make sure it was an actual improvement before I painted it. The ceiling looked a little humpy where I'd applied the cut tape, but I thought (hoped) it would blend in once it was primed. (HA!)
With the primer on, the "humpiness" is even more noticeable. So, now I have to mud and feather over all the areas where I'd cut the tape in half.
The 5 foot section I did with the 2" tape blends in just fine.
Lesson Learned: Feathering the mud is actually harder to do on a more narrow path (1" taped joints) than it is on a wider (2" taped) path.
I’ve been searching for articles on “anti-consumerism” and I’ve come across an interesting article in This Magazine, called The Rebel Sell, by Joseph Heath and Andrew Potter. I agree with this article but I disagree with it as well. Let me explain.
Heath and Potter write,
We find ourselves in an untenable situation. 0n the one hand, we criticize conformity and encourage individuality and rebellion. On the other hand, we lament the fact that our ever-increasing standard of material consumption is failing to generate any lasting increase in happiness. This is because it is rebellion, not conformity, that generates the competitive structure that drives the wedge between consumption and happiness. As long as we continue to prize individuality, and as long as we express that individuality through what we own and where we live, we can expect to live in a consumerist society.
I agree that, “As long as we continue to prize individuality, and as long as we express that individuality through what we own and where we live, we can expect to live in a consumerist society.” I also agree that there is a class of people in the US (and Canada?) who express their individuality through what they own and where they live (and what they drive and what/where they eat, etc., etc.). This class of people is referred to as the “middle” class or the “upper” class.
I am not a member of either of those classes. I am a member of the “lower” class, therefore I disagree with the following part of Heath and Potter’s statement.
On the other hand, we lament the fact that our ever-increasing standard of material consumption is failing to generate any lasting increase in happiness. This is because it is rebellion, not conformity, that generates the competitive structure that drives the wedge between consumption and happiness. (emphasis mine)
This statement seems to beg the question that conformity would generate an increase in lasting happiness, as it relates to our ever-increasing standard of material consumption, if conformity was indeed the issue.
In other words, according to Heath and Potter, giving in to the pressure to conform and buy what “everyone” has, would bring us lasting happiness … if only we resisted the urge to take the next step and rebel against the masses who copy us. That rebellion causes us to search for something else to buy that no one else has.
This spiral of having to buy something new and even more unique (or costly?) is what causes our loss of lasting happiness (according to our authors), not conformity.
Not only is this statement ludicrous, it entirely misses the point of anti-consumerism, at least for those of us in the “lower” class.
Anti-consumerism is about rescuing our hard-earned dollars and our self-esteem from the greed driven motives of giant corporations who want us to believe that the only way we can be accepted (loved) is by purchasing their products.
To those of us in the “lower” class, anti-consumerism has nothing to do with being cool, or unique, or “better than” the Jonses. It has to do with being “good enough.”
We don’t hear comments like, “[My] place is the real deal, a genuine factory loft, steeped in working-class authenticity, yet throbbing with urban street culture and a “rock-video aesthetic.”” (We are the authentic working-class, fergawdsake!)
We hear comments like, “You don’t have a TV in your bedroom?” “Your car is old, don’t you think it’s time for a new one?” “You bought that old house? I would’ve thought they’d have torn that house down by now.”
The message the anti-consumerist “lower” class hears is, you are not “good enough” (you should feel shame) if you don’t buy what we have bought.
It doesn’t seem to matter that they (our peers) can’t afford a TV in every bedroom, or a new car, or an expensive house, either. What matters is that they bought it (on credit- because advertisers told them they wouldn’t be loved if they didn’t). They “own” it (along with the bank), and if we don’t have the same things we should feel Ashamed and Embarrassed.
The burden of the “lower” class anti-consumerist is to resist this pressure to conform, to spend, to buy what we don't need. This isn’t an easy thing to do. Even for the most stalwart of us, this type of peer pressure can be overwhelmingly difficult to swallow without tasting some of the shame and embarrassment that is being dished out.
Therein lies the pain of non-conformity. However, to conform is to lose sight of our goals, to put our self-esteem in someone else’s hands, and to lose all hope for the future.
Conforming will not generate happiness, much less lasting happiness. It generates only a feeling of confusion, and at some point, it comes clear to us that we’ve surrendered our lives to line the pockets of the greed-mongers.
Joseph Heath and Andrew Potter write an interesting article that I believe offers some insight to the “middle” or “upper” class. But for us poor folk, it misses the boat entirely.
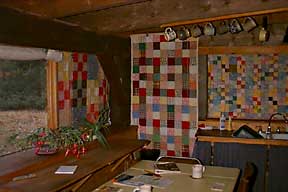
Did you know that windows are the cause of the greatest heat loss in your home?
Hanging Window quilts can reduce this heat loss by as much as 80%. Making Your Own Window Quilts is a very frugal way of saving money on your heating costs, doubly so if you can use materials that you already have.
These are some basic directions for making your own window quilts. More specific directions, as well as other ideas on what materials can be used are linked below.
- Measure the window you want to cover.
- Add one inch on all sides for the hem.
- Use fabric that you already have or Go to a thrift store to buy the fabric:
- Find sheets or curtains for the back and front (light colors let in the most light)
- Find blankets, mattress pads, or cotton for the batting
- Find old comforters for batting or as the entire window quilt itself (since it has three layers to it already - minus a vapor barrier)
- Look in the Thrift Store for a tension rod to hang the window quilt.
- Cut the front and back, batting, and vapor barrier (can be a sheet of plastic, sheet of bubble wrap, or just a cut open trash bag) to size.
- Layer the fabrics beginning with the Top, the Bottom, then Vapor Barrier, then Batting.
- Sew around three sides, then turn right side out.
- Hand or Machine sew the last side closed.
- Add a folded 2" strip of material to the top of the window quilt. Leave the ends open for the tension rod to run through (You can use a pully system or Velcro if you don't want to use a tension rod).
Many Tracks Window Quilt
Mother Earth News Thermal Shade
Solar Components Corp
I use this disinfectant everywhere in my home. I mop with it, clean out sinks with it, disinfect doorknobs and faucet handles with it, use it on countertops, and sometimes spritz a dusting cloth with it. Rinsing is not needed, nor is it recommended when using it to disinfect.
This home-made disinfectant is both environmentally safe and very frugal (inexpensive). You can increase the cleaning strength or the disinfectant strength easily.
All Purpose Disinfectant
- 1 cup white vinegar
- 1 cup rubbing alcohol
- 1 TBS scented cleanser
- 1 gallon water (boiled for 10 minutes then cooled)
- 1/4 - 1/2 cup high powered cleanser like Awesome, Greased Lightening etc. (optional)
Using a kitchen funnel, add all ingredients except water to a one gallon jug (I re-use the gallon jug my drinking water comes in). Fill gallon jug the rest of the way with cooled, boiled water. Fill spray bottles, using a kitchen funnel, to keep in as many rooms in your house as you find a need for.
Vinegar is both a disinfectant and a mold/mildew cleaner. To increase disinfectant strength, add more vinegar or more alcohol.
Rubbing alcohol is both a disinfectant and a quick drying agent. This is what those high-priced floor cleaners use to make the floor dry faster. To increase disinfectant strength or reduce drying time, add more alcohol.
Scented cleanser is used primarily for its scent. It can be anything from Tide with Fabreeze (I get free samples and save them for this cleanser) to a pine scented cleaner. The scent is up to you.
I boil the water for at least 10 minutes. Once it is sterilized this disinfectant cleanser will last indefinitely without discoloring.
I add 1/4 cup Awesome to this cleanser when I am using it on something really grimy. I keep one spray bottle filled with this disinfectant cleanser in my bathroom and another one in my kitchen. The spray bottle in the bathroom has extra vinegar. The spray bottle in the kitchen has Awesome in it (in addition to the usual ingredients).
I also have an empty dish detergent bottle filled with this disinfectant that I use to mop the floor. I just squirt out a line and mop. No rinsing and the floor dries in about 5 minutes.
Just spray and wipe.
Do you want to save money, be more organized, and know exactly how much clothing you have? Then print this list, grab a pencil, and dig into your closet and dresser.
Let's take it down to the basics. How many outfits do you need, and how many do you now have?Fall or Spring - Five lightweight pants. ___ pants
- 3 - 5 lightweight sweaters. ___ sweaters
- One jacket. ___ jacket
Winter
- Five pants or skirts or a combination of both. ___ pants ___ skirts
- Five long-sleeve tops or blouses. ___
- One pair of dress shoes. ___
- Two or three sets of pajamas. ___
- One coat. ___
Summer
- Five dresses, skirts, or shorts. ___ dresses ___skirts ___shorts
- Five short-sleeve tops or blouses. ___
- One pair of dress shoes. ___
- Two or three sets of pajamas. ___
For both Winter and Summer
- Five sets of underwear. ___ ___
- Five pairs of socks, knee-highs, or stockings. ___
- Two - three pairs of dress socks or stockings. ___
- One pair of comfortable shoes. ___
- One bathrobe. ___
All of these clothes should easily fit into an averaged sized closet and one dresser or chest of drawers. I would suggest that you only buy more clothing when you've worn out something to the point that you are ready to throw it away.
Something in? Then something has to go out. Both your wallet and your closet will thank you.
How many clothes do you have?
With your budget in mind and plenty of inside time in the winter, repair the things a buyer will see on the inside of your house.
1. First De-Cutter. If your house is full of furniture or knick-knacks, has piles of toys, magazines, papers, or a zillion candles, it's going to look too small. Whether your rooms are small or not, if they are cluttered they will look small.
So, pack up, donate, give away, or trash all of that clutter. De-cluttering now will make it much easier when you're ready to paint the walls, and it'll be easier to keep your house clean if there are fewer things to move around.
2. Repair holes in the walls and ceiling. Sheetrock (wallboard), paper joint tape, and joint compound are cheap, and fairly easy to learn. You can find many web sites online that will show you, step by step, how to repair sheetrock walls. Just take the plunge and try it. It's not rocket science.
3. Replace rusty, leaky bathroom and kitchen faucets. You don't have to spend $600 on a faucet. Lowes and WalMart have some nice looking faucets for under $75. I found a bathroom sink faucet with porcelain handles at Walmart for $28.
Sink faucets are pretty easy to install. The hardest part is hooking up the stopper thingy, and that just involves turning a screw and making adjustments.
4. Re-caulk the tub and scrub it well. If the tile surround or tub is in really bad shape, consider a new fiberglass tub and surround. These are fairly inexpensive to have installed. I paid around $900 to have a handyman/contractor buy, deliver, remove the old tub, and install the new one about 3 years ago.
5. Clean the carpet. If deep/steam cleaning won't make the carpeting look presentable, you may have to replace the flooring. Install Linoleum or Vinyl tiles, and use area rugs instead of wall-to-wall carpeting. Linoleum and Vinyl tiles are usually less expensive than wall-to-wall carpeting, and much easier to keep clean.
Hardwood floors are all the rage now, but if you have even a slight problem with moisture or your subfloors are concrete, hardwood floors will be ruined quickly (concrete or cinder block tends to wick moisture up from the ground, and a plywood subfloor would have to be installed).
Hardwoods are also quite expensive to buy, and the floors must be perfectly level to install them. Unless hardwood floors are the norm in your neighborhood, I'd pass on it. It's just more trouble and expense than it's worth.
6. Paint, stain, or clean the cabinets in your home. Paint is cheap and covers a lot of sins, even on laminates.
I have laminate kitchen cabinets, so I scrubbed them well then used 3 coats of high gloss paint. They look much better and wipe clean easily now.
7. Paint the walls and ceilings. A fresh coat of paint always brightens up a house, and also serves to neutralize the decor. But remember, now is not the time to choose bright, splashy colors. Stick with light, muted colors.
If your rooms are small, choose white for the walls and the ceilings. I know, white is boring, but most people aren't going to hate white walls and ceilings. They may feel that way about red or teal walls, however.
If your rooms are large, go with light tans, khakis, or muted greens for the walls, and white for the ceilings. Let your flooring colors guide you. If you have dark or multicolored carpeting or vinyl, choose a very light shade that matches, not contrasts, the floor color.
This list of First Things to Do ought to get you started. If you have any money left, I'll be back later to suggest what you might do next.
How many times have you longed to do something and told yourself: someday I'll....? I've done that since my first child was born 24 years ago. My most frequent fantasy? Moving to the Country.
Well, I've decided that "someday" has arrived. I'm going to sell my house and buy another one in the surrounding rural area. I'm going to move to the Country!
Some of you may be thinking, "Now? You're going to sell your house in the winter? Oh, you'll make a ton of money selling your house in a buyer's market, in the wintertime! Sure you will."
Actually, wintertime is the best time to start getting your house ready to sell. Since spring and fall are the best times to sell, the pressure is off during the winter. So, you'll have plenty of time to assess the house and begin making repairs and improvements before putting it on the market.
O.K. the decision to sell has been made. Now, what to do first? I have spent quite a bit of time doing research in this area, and it's easy to get confused.
Do I start with the outside first, the inside first, upgrade the infrastructure (plumbing and electrical) first, or should I fix what the inspector will, more than likely, ding me on first?
This decision is enough to make your head spin! But, my Frugal brain has managed to narrow it down. Where do you start? You Start with your Budget. How much money do you have to make repairs/improvements? How much money can you save/come up with before you put the house on the market?
You don't need to know the exact amount, just a ballpark figure. If your budget for home repairs is small/moderate, you may as well forget trying to do major projects and upgrades like replacing a roof. The national average for a new roof in 2002 was $11,399).
As for the infrastructure, if you have an older house like I do (built in 1950) there is sure to be old pipes and wiring in place. But, if normal maintenance has been done, you've more than likely upgraded parts of the electrical and plumbing systems already, (and hopefully been told by these tradesmen if there was a serious issue in these areas).
To attempt an overhaul in either area, just for the sake of an upgrade, would be extremely cost-prohibitive. However, if you have any doubts as to the safety of your electrical or plumbing systems, call and ask for a safety inspection.
Once you have an idea of your budget, take that money and start on the inside. Why? People are searching for a house to buy, not a yard. Sure, the yard is important and it makes a first impression on homebuyers, but it's fairly easy to get it presentable. Come spring, just grab some trash bags, pick up any debris, trim the bushes/shrubs, and mow the lawn. You don't even have to rake the leaves, just mow over them and leave in place for a natural mulch that your grass will love.
Want some ideas of what to Repair First? Read on...
After a year of working on my goals, it dawned on me that my goals had changed. Some had been accomplished, others had changed. Let's see how far I've come.
Goal #1: Create Freedom/Smart Accounts ACCOMPLISHED
SHORT-TERM GOAL: Save the minimum amount needed to pay irregular bills ACCOMPLISHED
LONG-TERM GOAL: Increase savings to upgrade coverage and provide a cushion This Goal has been suspended until after I move. At that time I will re-visit it and determine if it still fits my needs.
My Freedom (Smart Money) Accounts are at INGDirect. I keep just one account and divide them into categories in a Spreadsheet. My Categories are:
AUTO - for Auto Insurance and Tags
PROPANE - for heating gas (I have a note on the spreadsheet to remind me to fill the tank in the summer when prices are usually lower, and that tank rent is due in Oct)
SEASONAL - for seasonal clothes and gifts like Christmas
LIFE INSURANCE - obviously for life insurance premiums
I had several more categories in my Freedom Accounts, but found I didn't need them there. These 4 are the basic necessities.
Goal #2 Create an Emergency Fund
SHORT-TERM GOAL: Save $1000 ACCOMPLISHED
INTERMEDIATE-TERM GOAL: Save 3 months expenses PLUS a typical car repair, a typical home repair, and the medical insurance deductible (I added this one. I find it more reasonable than a 6 month goal when so many things in the house need to be done) ACCOMPLISHED
LONG-TERM GOAL: Save 6 months expenses PLUS enough to cover a typical car repair, a typical home repair, and the medical insurance deductible. This Goal has been suspended until after I move (see above)
I have my Emergency Fund in a Capital One Money Market Account. This account pays a little bit more than INGDirect (Cap One 4.8%, ING 4.4%) but more importantly it has check writing priviledges.
If an emergency occurs (as it did when the washer sprung a leak), I want access to the money immediately. I am more likely to need a checkbook for an emergency or a car repair than need cash, and the checks are free. This is why I chose Capital One for my Emergency Fund.
*The only down side to this account was that it was not EFT enabled (Electronic Funds Transfer). Capital One has now encorporated these accounts into their Direct Banking system, so you can withdraw funds to your checking account online, or write a check.
Goal #3 Pay Off Credit Card Debt
SHORT-TERM GOAL: Pay off smallest credit card bill ACCOMPLISHED
LONG-TERM GOAL: Pay off all credit card debt and stop using credit cards unless total can be paid each month (I have paid all but $560 credit card debt. This will be paid off in 3 months) 83% ACCOMPLISHED
Once the next to last cc debt was paid, I rolled that payment into this one. No backing off was allowed. I didn't even think of having money freed up, I just started sending it all to this last debt. It feels GREAT knowing I will have paid off $3289 in 1 year and 3 months time!
Goal #4 Contribute to Retirement Account
SHORT-TERM GOAL: Contribute at least 1% to retirement.ACCOMPLISHED
INTERMEDIATE-TERM GOAL: Increase contributions to reach employer match ACCOMPLISHED
LONG-TERM GOAL: Increase contributions to 10% - 20% This Goal has been suspended until after I move. Half-Way ACCOMPLISHED
Start with at least 1%, do more if you can and make it a goal to increase your contribution at least once a year. Roll your annual pay increase into your 401k and you won't even notice it. You will be accomplishing this goal without feeling even a pinch.
If your employer offers a match (most employers will match some portion of your 401k contribution) contribute at least enough to get the match. If you don't have a retirement account through your employer, open a Roth IRA account and contribute at least 1% of your take-home pay.
I contribute 5% to the 401k because the match cutoff is 5% (employer matches 50% of contributions, up to 5%).
Goal #5 Save for Home Improvements
SHORT-TERM GOAL: Decide on most pressing area for improvement and begin saving
LONG-TERM GOAL: Create savings sub-accounts for all improvements
If you own a house you're going to have to make improvements and repairs. All houses will need a new roof, new flooring, fresh paint, new appliances, and maintenance at some point. Saving for these things just makes sense.
Now that I've re-visited my Goals and realized they need a tweak, I've rewritten them, as follows:
New Goal #1: Pay Off Credit Card Debt
SHORT-TERM GOAL: 3 more months till all credit card debt is paid.
LONG-TERM GOAL: Stop using credit cards unless total can be paid each month ACCOMPLISHED
New Goal #2: Save just for Home Improvements needed to Sell the House
New Goal #3: Save for Down Payment and Closing Costs on a Home in the Country.
Remember: studies have shown that happiness comes from making progress on a Goal, Not on reaching that goal. So, always re-visit your goals and create new ones when you've accomplished (or suspended) the old ones. Keep a Goal of happiness and contentment a permanent part of your life.
Maybe it's just me. Maybe I'm just dense but I can't find a list of Prime Mortgage Lenders, anywhere.
I see plenty of information on Sub Prime Mortgage Lenders, but I can't find a bank, mortgage company, article, or website that will tell me who the Prime Mortgage Lenders are!
And I'm confused because I thought that "Prime" and "Sub Prime" were terms that referred to loans, not Lenders. For example, if you qualified for a "Prime" loan, then your credit, income, debt ratio, size of down payment, etc., were in good shape. But, if you couldn't qualify for a "Prime" loan, it was because of a low or "bad" rating in (usually) more than one of the areas I mentioned above (bad credit, low income, small down payment, etc.). And that meant you were reduced to getting a "Sub Prime" loan, and you would pay more for the loan.
But, lately I've been seeing many articles on "Sub Prime Lenders." These articles don't name these Sub Prime Lenders. Most just state that there are many Prime Lenders who have affiliates that are Sub Prime. They don't say who the Prime Lenders are either. Shouldn't someone have a list of Prime and Sub Prime Lenders? (Well, that's what I was hoping for anyway.)
Why do I care? Didn't I mention that I want to sell my house and buy another one in the country? That bit of information probably would have helped you understand my frustration, wouldn't it? And, I care because I want to make sure I'm not applying for a mortgage through a Sub Prime Lender. It's not like they'll tell you that you'll qualify for a better rate if you apply at a different Mortgage Company.
In this article the Mortgage Professor hints that two of the Prime Lenders are Countrywide(.com) and Indymac(.com). But, I think the other sites that he suggests for checking your eligibility for mainstream financing are mortgage brokers (mortgage brokers add their fee to the cost of your loan).
If anyone knows more about Prime and Sub Prime Lenders than I do (which obviously wouldn't be hard), and would like to educate me, please feel free to do so, cause I must be missing something.


